Summary
The protocol described below includes equipment needed and the procedure on how to prepare pyramid teabags to be buried in urban soils. The aim is to calculate decomposition rates by measuring mass loss of these teabags over time. Simply, teabags are soaked in hot tap water a few times, air dried for 2 days, weighted, buried in the soil after which some are retrieved at 3 months, 6 months, 9 months and 12 months after burial. After retrieval from the soil, bags are carefully cleaned, soaked, air dried, and weighed again. As such, a bag will have a before-burial ‘soaked-dried’ mass, and an after-burial ‘soaked-dried’ mass. Some bags will have been in the soil for 3 months, others for 6, 9 and 12 months. A full-scale, one-year scientific study requires 400 teabags (see Habitat Selection Protocol). Smaller-scale and shorter studies are also encouraged, to be done by interested citizens and as school projects.
Equipment needed
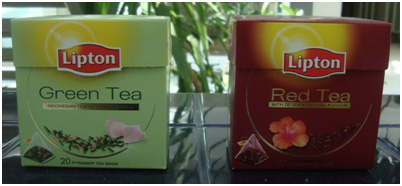
- Lipton Pyramid teabags – see, for instance http://www.liptontea.com/product or your local supermarket. We recommend Lipton red tea, but if not available, use green tea in a pyramid bag (made from nylon mesh: mesh size – 280-300 ?m). Use the same teabag type consistently within a study.
- Notebook and pen
- Metal nails, tags or washers
- Metal detector (if available)
- Permanent black marker pen
- Small garden spade, trowel or gardening knife
- Paper or plastic bag
- Laboratory balance to weigh teabags
- GPS (if available)
- Measuring tape
- Ribbon, plastic or metal markers
Note: most of these items are carried by Forestry Suppliers and Ben Meadows. They ship abroad.
Procedure
- Teabag preparation in the laboratory, classroom or kitchen
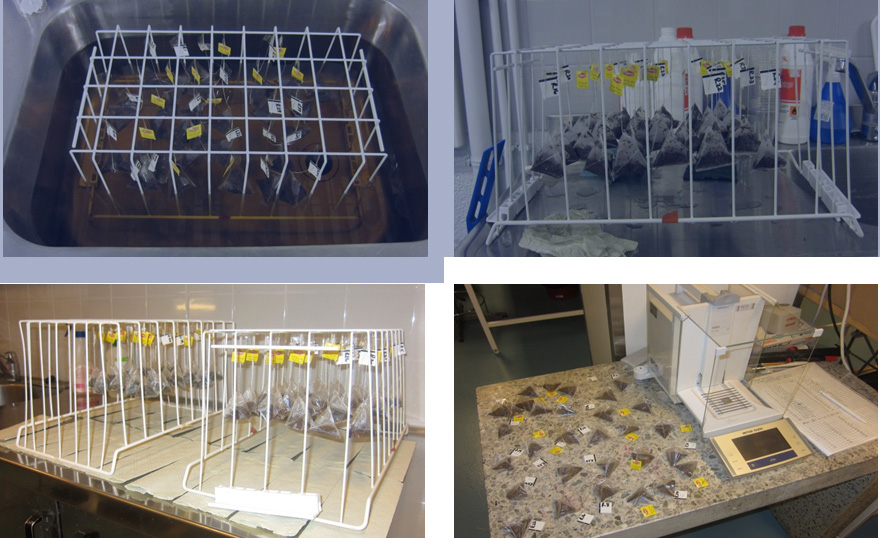
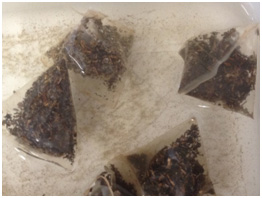
Steps to prepare teabags - Soak all teabags in hot tap water (about 60°C) for 20 minutes and drip-dry it for 20 minutes. Repeat this step 4 times until most of the colour is removed. This step is required since between 20-40% of the teabag mass is water soluble. This is important because natural rain may wash away a substantial proportion (mass) of solubles from the bags (abiotic mass loss).
- Air dry the teabags for 2 days at room temperature. For these two steps, many teabags can be soaked and dried at once if they are put on a rack as indicated above.
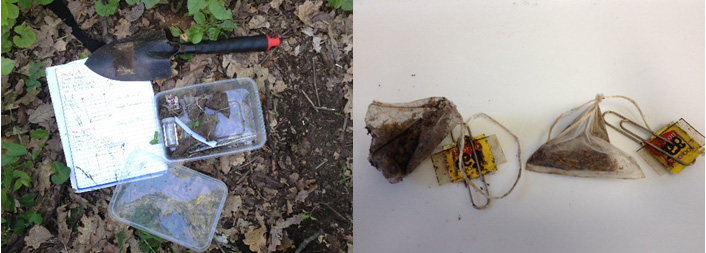
- Using a black permanent marker pen, mark each teabag on the back of the Lipton label (not on the yellow side of the label). Write a unique number on the back of the label, starting with, for instance 1 and ending with 400 (full-scale study).
- Weigh teabags – weigh the entire teabag with its label to 2 or 3 decimal points using a laboratory balance. Make sure that you note the correct mass of each teabag against its unique number in a spreadsheet (preferably Microsoft Excel – see end of this document). Soaked teabags weight typically between 1 – 2 g. For instance, 1.336g
- Site and habitat selection: for the full-scale, scientific study, see Habitat Selection Protocol
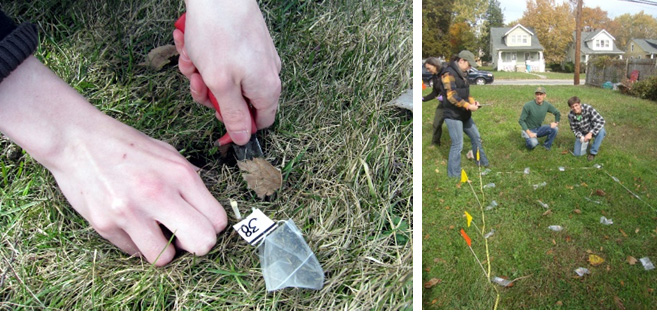
- Placement of teabags in the field: A photo taken of each selected site with characteristic, constant landmarks (e.g. a tree, rock, lamp post, etc.) can be very useful.
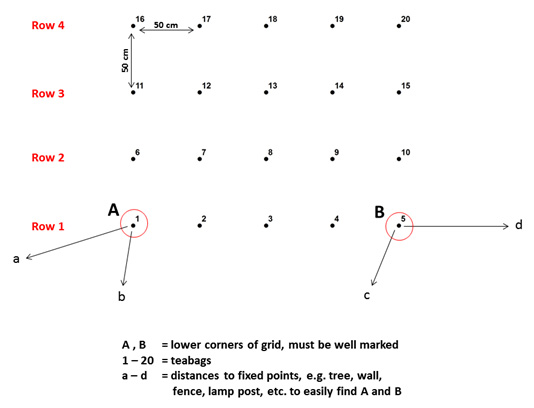
- Per site, place 20 teabags in a grid design (see above): 4 rows x 5 teabags per row. The teabags should be exactly 50 cm apart – which will help in finding the buried teabags in the future.
- The bottom two corners of the grid (A, B) must be clearly marked (ribbon, plastic or metal markers if metal detector is available). To enable easy detection of the grid in the future, the distance between the two corners (A, B) and some prominent fixed points (e.g. a tree, wall or lamp post, etc.) should be indicated on a drawing in your notebook, separately for each site. A GPS reading of each site can also be made.
- To ensure easier detection of teabags in the future, and if a metal detector is available, the string of each teabag can be tied around a metal nail or washer and buried with the teabag. If a metal detector is not available other means can be used for easier detection of teabags, e.g. a piece of fishing line (gut) can be tied to the string of each teabag and extend to the surface – only a small part of the fishing line should be visible on the soil surface.
- Bury teabags no deeper than 5 cm, and make sure that the teabag, label and nail/washer are below the soil surface. Use a small garden spade. Place the teabags in chronological order as indicated in the figure above, and note the exact unique numbers of the teabags on the grid in your notebook. This will ensure the correct identification of each teabag after collecting, in case the numbers are not clear on the labels.
- The removal of teabags:
- Per site, remove 5 teabags (one row) after 3 months, 5 bags (another row) after 6 months, 5 more bags after 9 months, and the last 5 teabags after 12 months. Shorter-term studies can also be performed, for instance for 3 or 6 months. Green Lipton pyramid teabags are recommended for these shorter studies (green tea leaves degrade quicker than rooibos/red tea leaves).
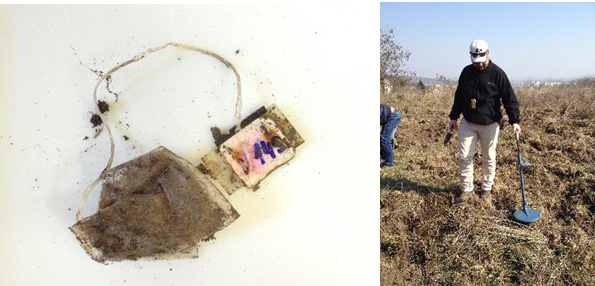
- Use a small garden spade to remove the teabags. Take care not to damage the bags, the strings or the labels. Remove also the metal nails/washers and cover the hole with soil. Put the 5 teabags collected per visit per site in a plastic/paper bag and write the date and name of the site and the habitat type on the bag.
- Per site, remove 5 teabags (one row) after 3 months, 5 bags (another row) after 6 months, 5 more bags after 9 months, and the last 5 teabags after 12 months. Shorter-term studies can also be performed, for instance for 3 or 6 months. Green Lipton pyramid teabags are recommended for these shorter studies (green tea leaves degrade quicker than rooibos/red tea leaves).
- Weighing of the teabags:
- For the full-scale, scientific study, you should have collected 100 teabags after the first visit (3 months): 20 sites x 5 teabags per site.
- Take the 5 teabags per site per visit to the laboratory, classroom or kitchen and clean them thoroughly. Gently remove dry mud and roots from the outside of the bags. If the bags are wet, let them dry for a day or two, and then gently remove the dried mud/roots from the outside of the teabags. Take care not to rip the teabags while removing the mud/roots.
- Soak the teabags in hot tap water for 20 minutes, take them out, and gently massage them for 1 minute under running water to remove the excess loose material. Put a net/sieve under the teabag in case the contents fall out.
- Airdry the bags for 2 days at room temperature. If there are visible plant roots on the bag, gently remove them. If a significant quantity of roots remains inside the bag, open it up, and remove those.
- Weigh each teabag (with string and label) with a laboratory balance to 2 or 3 decimal points and enter the data into the spreadsheet mentioned in step 1d.
- Repeat steps 4) and 5) after 6, 9, and 12 months.
Spreadsheet Example
| Habitat | Teabag no. | Original teabag mass (g) | Month 3 mass (g) | Month 6 mass (g) | Month 9 mass (g) | Month 12 mass (g) |
|---|---|---|---|---|---|---|
| Turf 1 | 1 | 1.762 | x | |||
| Turf 1 | 2 | x | x | |||
| Turf 1 | 3 | x | x | |||
| Turf 1 | 4 | x | x | |||
| Turf 1 | 5 | x | x | |||
| Turf 1 | 6 | x | x | |||
| Turf 1 | 7 | x | * | |||
| Turf 1 | 8 | x | x | |||
| Turf 1 | 9 | x | x | |||
| Turf 1 | 10 | x | x | |||
| Turf 1 | 11 | x | x | |||
| Turf 1 | 12 | x | x | |||
| Turf 1 | 13 | x | x | |||
| Turf 1 | 14 | x | x | |||
| Turf 1 | 15 | x | x | |||
| Turf 1 | 16 | x | x | |||
| Turf 1 | 17 | x | x | |||
| Turf 1 | 18 | x | x | |||
| Turf 1 | 19 | x | * | |||
| Turf 1 | 20 | x | x | |||
| Turf 2 | 21 | x | ||||
| . | . | . | ||||
| . | . | . | ||||
| . | . | . | ||||
| . | . | . | ||||
| Reference 4 | 398 | x | x | |||
| Reference 4 | 399 | x | x | |||
| Reference 4 | 400 | x | x |
* if a teabag has been lost/destroyed, leave the cell empty for that particular site/visit